Saturday, December 8, 2012

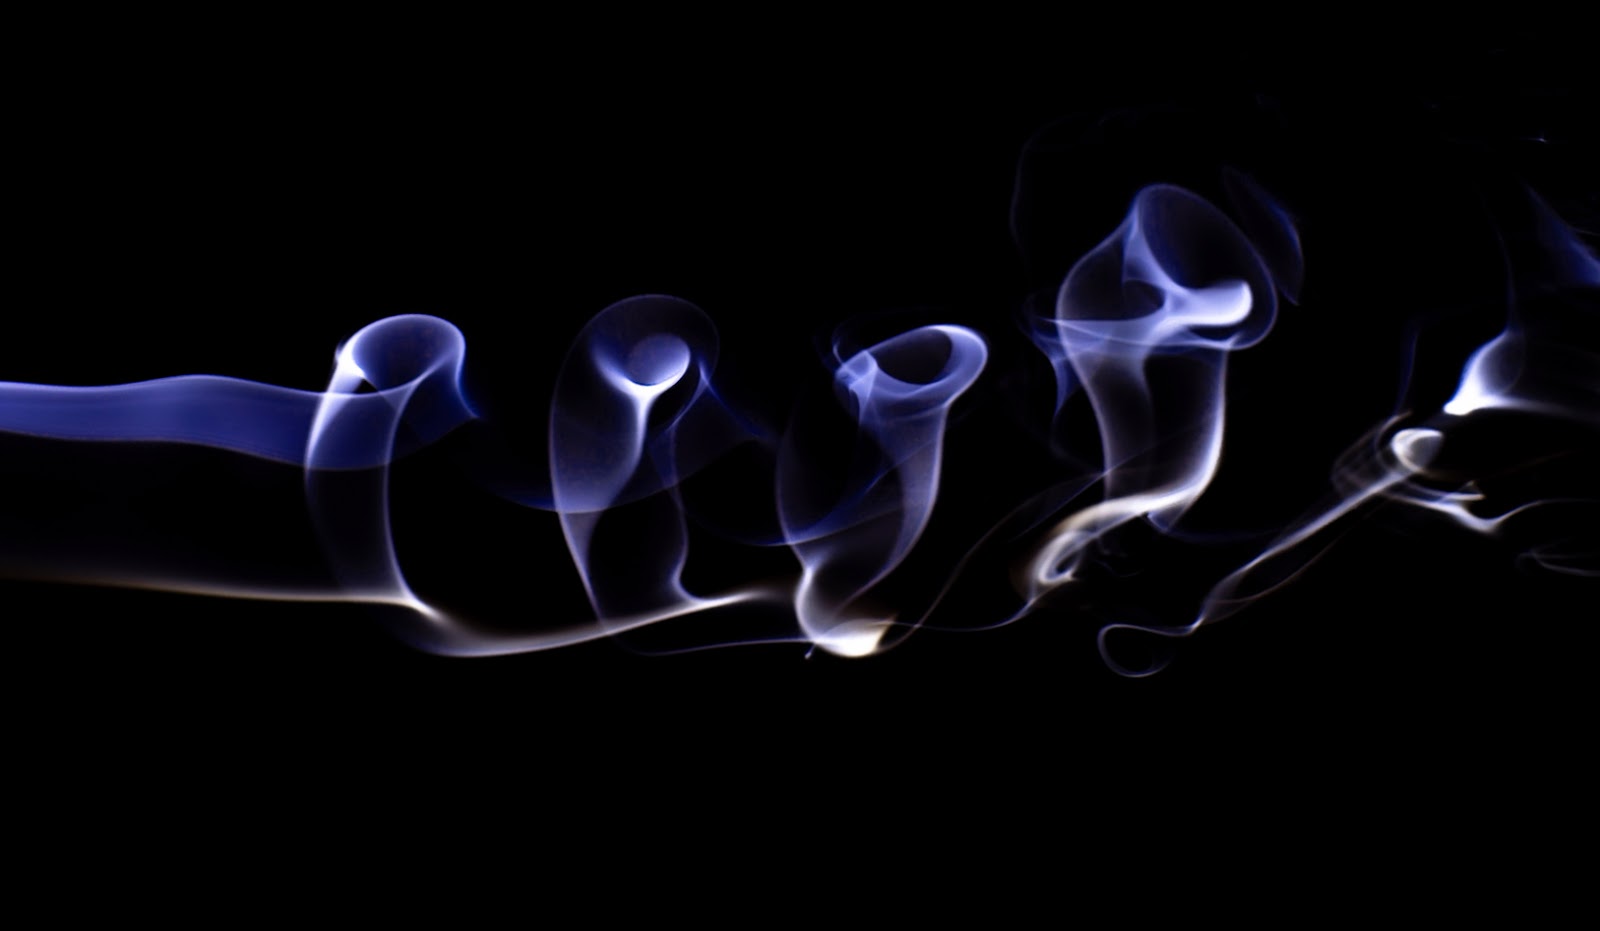
My First Smoke Pics


©JP Parmley
They say that once you start smoking, it can become habit forming.  Today I set up my first smoke picture experiment and I am starting to believe I'm hooked.  No two pictures will ever be the same and the imagination can run wild interpreting the smoke formations, much like one does with clouds. 

The set up for these pictures is very straight forward and easy to set up.  With a black background I have a strobe camera left.  With a 50mm prime lens mounted on a Canon 5D MII, I configured the shots at f7.1-16 and 160th, ISO 50.  I cranked up the flash to compensate for the small aperture and low ISO.  I spent $4 dollars on a hand full of incense sticks and off I went.

After converting the raw images to JPG, I imported them into Photoshop where a quick adjustment of the hue and saturation provided the color.  I am looking forward to shooting these again with my 24-70 2.8L macro lens as well.


Saturday, November 10, 2012

Sun Sets with Point and Shoot Camera

©JP Parmley
Two weeks ago, my wife and I had the opportunity to take an western Caribbean cruise.  The minute we decided to go, nearly 9 months prior, the dilemma started.  Do I take my favorite 5D MII and my work horse 24-70 2.8L?  If you have ever been on a cruise you know there is lots of three things: Sun, water, and sand (at the beaches), none of which is terribly great for camera equipment.

After much thought, I decided to leave the pro gear at home, find a decent point and shoot camera so I could enjoy the vacation and not worry about my gear every minute of the day.  I landed on the Canon S100.  I chose this model because of three factors; 1) It can shoot in a RAW format. 2) It has a 2.0 lens, and 3) It has a fully manual mode.

Now, the pictures I show below are in no way professional quality, but I was quite happy with some of the results with the little $360 point and shoot.  If you are looking to get a better sunset picture with your point and shoot, follow these guidelines.

Take a look at the first picture.  We have all seen someone's vacation picture that looks like this.  A typical result from an automatic or program mode that utilize an evaluative metering mode.  The pictures that follow leverage a fully manual mode, exposing with  spot metering on the sun and then adjusting the shutter to underexpose from 1/3 to 1 1/3 stops.  The color is brought out and gives the picture some contrast and dimension.  The only post processing that was performed was to run these through Lightroom 3.6 to reduce some of the noise that point and shoots typically have.


Program mode with evaluative metering.......Don't do this!

Manual Mode with spot metering

Manual Mode with spot metering


Manual Mode with spot metering

Manual Mode with spot metering

Manual Mode with spot metering


Besides insuring your exposure is correct, think about the rule of thirds.  To add some additional dimension, place the horizon on one of the two third's lines, depending on if you want to highlight the sky or the ground.
 
If you have any questions about how to get the best out of your point and shoots, let me know.

Enjoy,

JP


Thursday, October 11, 2012

Custom Bokeh

 ©JP Parmley


Here is a quick and simple method to creating custom bokeh effects using just construction paper, tape and a scissors.    Watch the video here.


Sunday, September 30, 2012

Processing HDR Images of Classic Cars


 ©JP Parmley

I wanted to share my techniques of processing the HDR images of the classic cars.  The video below will show three basic steps.

1) Lightroom
2) PhotoMatrix
3) Lightroom

The third step is where all the magic takes place and the final action I take is what gives the cars the high gloss look and feel. 

Watch the video here.


Thanks

JP


Monday, August 20, 2012

Hot Rod Glamour Shots


 ©JP Parmley


I have been working on improving my HDR techniques.  I have spent the last few weeks working on a portfolio of hot rods, classic cars and motorcycles.  The color and depth that you can achieve with HDR is astonishing.

I have actually created  a site called Hot Rod Glamour Shots that focuses on these vehicles and HDR.

Leveraging three images, PhotoMatrix and Lightroom here are some of the images that were created.

Check out the web site.

From a Computer: www.photographybyparmley.com\hotrod
From a Mobile device: www.photographybyparmley.com


Rain on Your Wedding Day

©JP Parmley


Whenever you have an outdoor wedding, you take the chance of battling mother nature. Here are a few fun pics we did just after the rain stopped. It actually rained during the wedding. Guests held umbrella's for us as we shot ceremony.


Thursday, July 26, 2012

Love in the Sky

©JP Parmley


Here is why I always have a camera sitting around ready to go.  Even if it is an older (2003) Canon 10d with a just as old Tamron 28-75mm lens.  30 seconds after I noticed the formation it was gone.  If I had to assemble a camera and lens I would have missed this shot.  


The camera was in a low resolution setting so the the picture is pixelated a little. It is kind of a cool pic anyways.

Enjoy

JP

Wednesday, July 25, 2012

Rainbow of Colors

©JP Parmley

Here are a few quick and easy pictures you can capture with minimal setup.  The variety of different effects and colors is unlimited.  To set this up you will need a blank and unused CD or DVD, a tripod that will allow you to shoot straight down, a remote shutter cord and your camera.


I used the light painting techniques discussed in earlier posts, the only difference is this setup provides the CD to act as a prism and water to reflect all the colorful light.   Use a dropper to place each water drop.  You can mix up the sizes and density of the drops to get different affects.  I used either a small Mag-lite or LED flashlight and moved them around during the exposure. Try illuminating the CD and droplets from different angles and distances.  You will get something different every time.

In each of these pictures I used a shutter of 15 seconds, f6.3 and an ISO of 100.   


Monday, July 9, 2012

Blue Angels

©JP Parmley


The Blue Angels were in Dayton this weekend for the air show.  If you have never seen them, you need to find the closest show to you and go.  It is worth the trip!  

Here are some images that I captured during their show.  There are a few things to set up before you start taking pictures of planes flying over 500 mph towards each other with a closing speed of 1000mph+.  If you just turn on the camera and start shooting, most of your pics are going to be out of focus or the camera will not take the picture right when you want.

1) Set drive to AI SERVO.  This will allow you to gain focus and keep it as planes approach at these speeds. 
2) Set the metering to SPOT.  If you are shooting against a bright sky and are using an evaluative meter, the plane will be underexposed.
3) For these pics I wanted to maintain an aperture that I know my lens performs well at and is sharp.  I set the camera to an aperture priority (Av) at 5.6.
4) Next, I wanted a shutter in the 1000-2500 range depending on if I was shooting into the sun. So I adjusted the ISO until the shutter was consistently in this range while focused on a plane in the sky.  ISO 400 is where I landed.
5) Finally, the white balance was changed to outdoors (sun). 

So with a Canon 7D, a 70-200 2.8L IS lens and a Tamron 1.4x extender, I had an effective zoom of 448mm.  As F18s approached, I would grab focus as they approached and then shot in the highest drive mode at 8fps and shot away.

Take off with a 90 degree vertical climb
My favorite shot of the day.  Vapor trails off the wings.

The diamond formation


Think about this....over 1000mph closing rate and I got it dead on top of each other!

I could have used a slower shutter to correct the exposure of the planes.  Oh that's right we always shoot RAW so we have full control afterwards!

Up, Up and away!


Final Salute.
 

Saturday, July 7, 2012

Fireworks

©JP Parmley


Here are a few pics of the fireworks our neighbor shot off.  I chose to take some longer exposures to get a slightly different effect.  The longer the exposure, the longer the light trails will be.

Each of these were taken at 1 sec, f5.6, ISO1000 on a Canon 7D and a 16-35 2.8L II lens.  Because of the long exposure and slightly higher ISO, I reduced the noise in Lightroom 3 and cropped them to fill the frame.
 
I'm headed to the Dayton Air Show on Sunday with an effective 720MM zoom!  Hopefully I will have some neat Blue Angels pics to share early next week.


Wednesday, June 6, 2012

Transit of Venus

Transit of Venus
©JP Parmley


I was not able to get set up for this event, but Steve was ready to go...waiting for the clouds to break long enough to get a few shots.  Below is how he got the shots and time lapse video.

First, TransitofVenus.org describes the event as "When Venus passes directly between earth and the sun, we see the distant planet as a small dot gliding slowly across the face of the sun.  Historically, this rare alignment is how we measured the size of our solar system.  The view is like a front row seat to the transit method, by which we now find planets around distant stars."   

The next time this event occurs is December 2117.  Needless to say, this is my last blog and his last pictures on this subject.

Just as in the previous post, careful attention had to be taken to ensure that neither eyes or equipment was damaged.  The set up was virtually the same except the lens was changed to a 70-200 2.8L IS. The effective 448mm set up from camera to lens was:

Zacuto Z-Finder
Canon 7D w/ remote shutter release
Tamron-F AF Tele-Converter 1.4x
Canon EF 70-200mm 1:2.8 L IS USM
Promaster UV filter 77mm
Vivitar Series 1 HD Pro NDX Variable Neutral Density Filter 77mm
Vivitar Series 1 HD Pro NDX Variable Neutral Density Filter 82mm
(The ND filters each step up the diameter of the threads (77 to 82, and 82 to 86) which make them nice for stacking and avoiding vignetting)

Pictures around 6-7pm were taken at ISO 100, f 32, 1/1000s, 200mm with both ND filters set to about 90% of maximum (~7-8 stops each).

As the sun set, the light was greatly reduced so the settings were adjusted to ISO 100, f 32, 1/50s, 200mm while both ND filters set to about 10% of maximum (~2 stops each). 

The 7D's live mode and digital zooming focus feature made the fine focusing adjustments at infinity very easy and quick.


Special thanks to Brian Davis, Chief Meteorologist, of WDTN Storm Team 2 for continuing to show our pictures on their weather segments.

There was some spare time as the sun set so Steve captured 3 minutes of video with the same setup at 1024 (30fps) and then was cropped, time compressed it to 15 seconds and then rendered it in Final Cut Pro for a NTSC format.  After the second time I watched it, I noticed something strange......do you notice it?

You can see the video here.   

Enjoy,

JP